
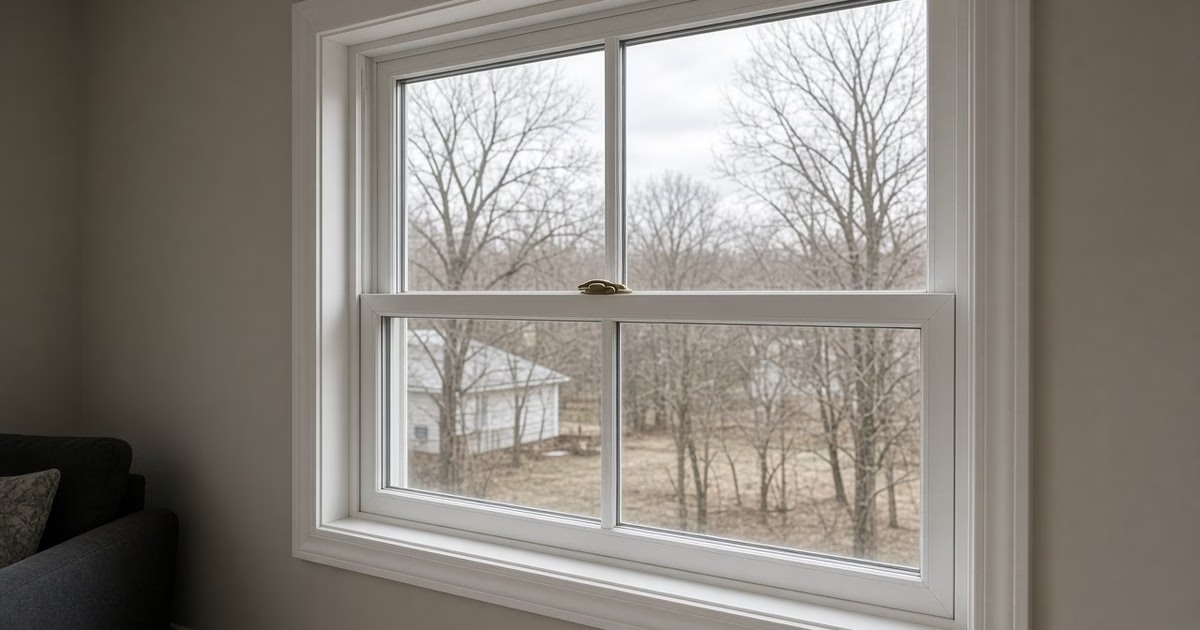
Published October 28, 2026. The air-sealing, warranty and label statements below come from the published sources listed at the end of this page. We do not sell or install windows and we did not test the units in your home; this page describes what a cold draft from a new window usually means, how to find the cause, and who normally pays to fix it.
A new window that feels drafty is not automatically a defective window, and it is not automatically a bad installation either. There are a handful of things that could be happening behind that cold feeling, they do not all have the same fix, and they do not all have the same person on the hook for repair. The useful question is not “is this normal?” — it is “which of these is it?” This page walks the four or five places a draft actually comes from, how to tell them apart in your own house, what you can fix in an hour on a Saturday, what belongs with the installer, and what belongs with the window manufacturer under the product warranty.
Is some draft normal in a brand-new window?
A brand-new window should not blow cold air into the room, but a new window is also not a wall: at a cold outdoor temperature there will be a cool surface near the glass and the frame, and air near that surface will drop. That is not a draft, that is convection against a cold surface, and it is strongest on single-pane and older double-pane units. On a modern double-pane low-E window installed in a cold climate, the interior glass surface still runs cooler than the room, and you can feel that if you put your hand on it; what you should not feel is moving air coming through the window or around it.
The practical distinction, with the window closed and locked on a cold day:
- Cool but still air at the glass or near the frame, strongest when you hold a hand within an inch of it, no feeling of movement — that is cold-surface convection and is expected on any window at a cold outdoor temperature.
- Moving air you can feel on the back of your hand, flickering a candle flame or a thin strip of tissue, especially where the sashes meet or around the trim — that is an actual draft, and something below is not sealing.
- A whistle or a hum in a stiff wind that disappears when the wind drops — that is usually air moving through a specific gap at pressure. It is a strong signal that something is open to the outside that should not be, often at the frame-to-wall interface or at a weep hole fitted incorrectly.
The U.S. Department of Energy’s Energy Saver guidance treats a window’s rated performance as a lab number that assumes proper installation; the air leakage you actually feel in the room depends on how the window was fitted into the wall, not just on the product on the sticker. So “my new window is drafty” always has at least two possible owners — the window and the install — and the point of the checks below is to tell them apart before anyone pays for a fix.
Find the leak: where it’s coming from, and who likely owns it
Walk around the window on a cold or windy day with the sash fully closed and the lock engaged. The location of the draft is the single most useful clue to its cause and to who owns the fix. Swipe sideways on a phone to see every column.
| Where you feel it | What it usually means | Who likely owns the fix |
|---|---|---|
| At the meeting rail of a double-hung (the horizontal where the two sashes meet) | Top sash not fully raised, or the sash lock not thrown; the lock is what pulls the two sashes together against the seal | Homeowner, in about a minute |
| Along the sash edges (sides and top for a casement, sides and bottom for a double-hung lower sash) | Weatherstripping torn, missing, pinched, or a sash that will not pull flat against its seal; on casements, a crank or multi-point lock out of adjustment | Homeowner for a quick reseat; installer or manufacturer if the sash itself will not close flat |
| Between the window frame and the wall (behind the interior trim, or at a visible gap under the stool) | The gap between the window and the rough opening was not sealed with low-expansion foam or backer rod and sealant, or the air seal failed | Installer, under the workmanship warranty |
| Behind the interior casing or at the drywall return | Same as above — the perimeter air seal in the rough opening is not continuous; the trim is cosmetic and does not seal | Installer |
| Whistling in a stiff wind, dropping when the wind drops | Air moving through a specific gap at pressure; often at the frame-to-wall interface, or at a weep hole fitted with the wrong insert | Installer; manufacturer if a factory part is wrong |
| From a nearby outlet, baseboard, or ceiling fixture that got colder after the window was installed | Air is being pulled through the wall cavity because the window’s rough-opening seal is open; the outlet is not itself the leak | Installer, with the window |
These are likelihoods, not proof. The checks in the next section are how you confirm which one applies on your window.
Four checks you can do yourself
Do these on a cold day, a windy day, or both, with the window fully closed and locked. Document what you see with phone photos or short video: the clip of a tissue strip fluttering at the meeting rail is a far more useful attachment to a service request than a sentence that says “it feels drafty.”
1. Lock, sash seated, nothing in the track
On a double-hung, raise the top sash all the way up until it stops, lower the bottom sash fully, then throw the sash lock. The lock is a cam that pulls the two sashes together at the meeting rail; without it thrown, the sashes rest against the weatherstrip without compressing it. On a casement, close the sash and throw the handle through its full travel — most casement locks are multi-point and pull the sash tight at two or three points along the stile. Check the track and the sill: a pebble, a bit of debris, a stray screw, or a piece of packing left from install can hold a sash a few millimeters off its seal and that is enough to feel.
2. Paper or dollar-bill test around the perimeter
Open the sash, place a strip of paper or a dollar bill across the seal, close and lock the window. Try to pull the paper out. If it slides out with little resistance, the sash is not compressing the seal at that point. Move the paper every six to twelve inches around the whole perimeter — a seal can be tight at the center and loose at a corner. Repeat on both sides of the meeting rail of a double-hung, including at the ends where the sashes meet the jamb.
3. A careful smoke or incense test
DOE’s Energy Saver tips describe using an incense stick to find air leaks: on a cold or windy day, close all exterior doors and windows, turn off the furnace, turn on any exhaust fans that blow air outside (bathroom fans, range hood) to depressurize the house slightly, then pass a lit incense stick slowly around the window frame, the meeting rail, the trim and the drywall return. Smoke that gets sucked toward a gap, or blown back into the room, is marking an actual air path. Keep the incense away from curtains, blinds and anything flammable, and have an open flame plan in mind before you start; if you prefer, a thin strip of tissue taped to a pencil shows movement just as well without the smoke.
4. Optional: a thermal camera on a cold or windy day
A phone-attachment or standalone thermal camera makes cold air paths visible as dark streaks across the trim, the drywall return and the sill. A thermal image is useful for pointing at a spot, not for proof that the window is defective: cold spots can mean air movement, missing insulation in the wall cavity, or simply a cold frame section, and the camera cannot tell you which. Take the image on a day with a real temperature difference across the wall (ideally 20°F or more) and, where possible, with the house slightly depressurized as above. Save the image with a note of the outdoor temperature and whether it was windy.
If any check shows movement, note which window, which spot and which conditions. That is what the installer or the manufacturer will want to see.
Fixes by cause: what you can do, and what belongs to a professional
What a homeowner can usually fix
- Engage the sash lock, raise the top sash fully on a double-hung. This is the single most common “drafty new window” cause and the one that disappears without a service call.
- Clear the track and sill. Vacuum debris, remove any packing left from the install, check for a screw that has worked loose into the track.
- Reseat a dislodged weatherstrip. If a fin or brush seal has popped out of its slot, press it back in; most are retained by a friction fit or a small barb along one edge.
- Adjust the sash per the manufacturer’s instructions. Casement sashes can usually be adjusted at the hinges to pull tighter against the seal; double-hung sashes with jamb liners can usually be re-balanced. Follow the product’s own documentation — adjusting a sash by trial and error can mark the finish and void the warranty.
Nothing on this list requires opening the wall, dismantling exterior flashing, or blocking the weep holes along the bottom of the exterior sill. Those holes are deliberately there to drain water out of the frame; sealing them traps water inside the frame and causes a bigger problem than the one you are trying to fix.
What belongs to a professional — usually the installer
- Air sealing the perimeter of the rough opening. The gap between the window frame and the framed opening in the wall is normally filled with low-expansion window-and-door spray foam (the standard foam will bow the jamb and bind the sashes) or backer rod and sealant. If that gap was not sealed, or the seal failed, the installer should correct it under their workmanship warranty.
- Reworking exterior integration and flashing. Pan flashing at the sill, housewrap integration at the head and jambs, and the sealant joint between the exterior trim and the siding all affect air (and water) tightness. These are install-side details and should not be touched by a homeowner on a window that is under warranty.
- Replacing a defective weatherstrip or sash that will not seat. If the sash itself is twisted, if the weatherstrip was damaged in shipping, or if a lock cannot pull the sash flat, the installer and the manufacturer sort out which warranty picks up the replacement; the manufacturer’s product warranty normally covers parts, and the installer’s workmanship warranty normally covers the labor to put them in.
Who pays: workmanship vs product warranty
Two different documents govern who pays for a repair on a brand-new window, and most homeowners only ever see one of them.
Workmanship (installer) warranty. This is written by the company that installed the window, lives in your contract with that company, and typically covers labor and anything that depends on how the window was put into the wall: the perimeter air seal, the exterior sealant joint, the trim, water intrusion caused by install details, and the installer’s own hardware adjustments. Duration varies by company; some are one year, some are limited lifetime on install only. Read what yours says before you call.
Manufacturer (product) warranty. This is written by the window manufacturer, usually in a separate booklet or PDF, and covers the window itself: glass seal failure, hardware failure, defects in the sash and frame. Lengths vary by part — the frame is often “limited lifetime,” the glass seal is often ten to twenty years, hardware and screens are often shorter — and most are limited to the original buyer and the original address unless a transfer is explicitly offered. Our window warranty decoder walks through what “lifetime,” “limited lifetime,” glass seal, hardware, labor and transferable each actually mean on paper.
In practice, a draft complaint on a new window is almost always handled by the installer first. They inspect, they decide whether the fix is a workmanship item (they do it on their dime) or a product item (they file a warranty claim with the manufacturer for the part and either absorb or charge the labor, depending on their contract), and they take it from there. If the installer refuses to inspect or the problem is clearly in the sash itself, the manufacturer’s warranty line will take the call directly, but the manufacturer will usually ask the installer to look first.
How to document the problem and contact the installer
A short, specific, dated service request moves faster than a general “it’s drafty” email. Include, in writing:
- Install date and project address. Attach a copy of the contract or invoice if you have the PDF.
- Which window(s). Elevation, room and opening (for example: “west elevation, primary bedroom, left casement”) — not just “the bedroom window.”
- What you observe and when. “Air movement at the meeting rail with the sash lock engaged and the top sash raised fully, on days with sustained wind. No whistle.” Dates and outdoor conditions help.
- Short video or photo evidence. A ten-second clip of a tissue strip fluttering at the meeting rail is worth a page of description. A thermal image, if you have one, with the outdoor temperature and wind noted.
- What you have already tried. “Engaged the sash lock, cleared the track, reseated the weatherstrip on the lower sash.” This tells the service tech what to skip.
- The ask. “Please inspect and advise which items are workmanship and which are a manufacturer warranty claim, and the expected timeline.”
Send it by email so there is a dated record, and copy whichever address the contract names for warranty claims. If the contract names a response window (for example, 10 business days for warranty inspection), note the date you sent the request and follow up in writing when that window passes. Keep the thread on one email chain rather than starting new ones.
NFRC and ENERGY STAR air leakage: lab rating vs installed performance
Two numbers get quoted when a drafty new window turns into an argument, and they do not say what people often think they say.
The NFRC Air Leakage (AL) rating is a lab value for the window assembly on a test apparatus, in cubic feet per minute per square foot of window area, at a reference pressure. DOE’s Energy Saver page on NFRC ratings is explicit that this value “depends on proper installation of a window, which is assumed in all ratings.” The AL rating is also an optional item on the NFRC label — manufacturers are required to report U-factor and Solar Heat Gain Coefficient to use the label, and may choose whether to report AL and Condensation Resistance. Our page on how to read an NFRC window label walks through what is required and what is optional, and what to ask the quote for when a number is missing.
The ENERGY STAR air leakage criterion for most residential windows is ≤0.3 cfm/ft², and under the current Version 7.0 specification (effective October 23, 2023) a window must also meet U-factor and SHGC criteria for the climate zone where it is being sold. In other words, an ENERGY STAR sticker is not evidence that the window is especially tight — it is evidence that the lab AL came in under the 0.3 threshold and that the climate-zone U-factor and SHGC criteria are met. Air leakage alone does not qualify a window, and the ENERGY STAR label alone does not tell you how tight it is beyond the 0.3 cap.
Both numbers describe the product in a lab, not the window as fitted into your wall. A unit with an excellent AL rating can still feel drafty if the perimeter around the frame was never sealed, and a unit with no reported AL at all can be perfectly tight in service when installed properly. When a drafty-window conversation drifts toward “but it’s ENERGY STAR” or “the AL number is X,” the first useful move is to redirect it to the question of where the air is actually coming from — the window itself, or the gap around it. The checks earlier on this page answer that question; the warranty section decides what to do with the answer.
If you are still comparing quotes rather than fighting a draft, see our guide to insert vs full-frame replacement — the install method is the single biggest decision about whether the perimeter around every new window gets reworked or inherited from the old one.
Next steps
The order of operations, with a draft from a new window:
- Confirm the fix is not already in your hand. Lock the sash, raise the top sash fully, clear the track. If the draft stops, you’re done.
- Locate the draft. Use the paper test and, if the draft only shows up in wind, listen for a whistle. Note which windows and which conditions.
- Document it. Short video of a tissue strip at the leak, photos of the trim and the sill, outdoor temperature and wind noted.
- Call the installer in writing. Use the template language above; ask them to inspect and to say which items are workmanship and which are a manufacturer warranty claim.
- If the installer confirms a product defect, ask for the manufacturer warranty claim number and the expected lead time for the part. If the installer refuses to inspect, call the manufacturer directly with the window’s product line, install date, and your documentation; they will either send someone or ask the installer to.
FAQ
My installer said “all windows are drafty when it’s cold.” Is that true?
No, and it is not a complete answer. Any window will feel cooler at the glass than at an interior wall on a cold day, because the window’s surface runs cooler — that is cold-surface convection. What should not happen on a brand-new, properly installed, closed and locked window is air you can feel moving on the back of your hand, a whistle in wind, or air coming out of a nearby outlet that is colder than the room. The checks on this page separate the two.
Is a casement less drafty than a double-hung by default?
On the AL number, casements tend to come in tighter than sliding-sash windows of the same quality tier, because the sash is pulled against a compression seal all the way around rather than against sliding weatherstrips. That is a tendency, not a guarantee — a well-made double-hung with a well-adjusted meeting-rail lock can be very tight, and a casement with a crank out of adjustment can leak. Our page on casement vs double-hung windows covers the trade-off beyond air leakage.
Can I just add weatherstripping or caulk around a new window myself?
Weatherstripping along the sashes is a reasonable homeowner fix if the factory weatherstrip is torn or missing, and caulk at the exterior sealant joint between the trim and the siding is a reasonable homeowner fix if it has split or pulled away. Do not caulk the sashes shut, do not seal the weep holes along the exterior sill, and do not open the interior trim to inject foam yourself on a new window that is still under warranty — that work is the installer’s to do, and doing it yourself can make the warranty argument harder, not easier.
Does a thermal image prove the window is defective?
No. A thermal image shows surface temperature, which can be caused by air movement, by a missing bit of insulation in the wall cavity next to the window, or by a cold aluminum section of the frame itself. It is a useful pointer to a spot that warrants a closer look, and a useful attachment to a service request, but it is not evidence a court would treat as proof on its own. Pair it with a paper test or a smoke test at the same spot before you draw a conclusion.
How long should the installer take to inspect?
Whatever the contract says. Some workmanship warranties name a response window (for example, “inspection within 10 business days of a written service request”) and some do not. If yours does, hold them to it in writing. If yours does not, a reasonable expectation during a normal season is a few weeks for inspection and a few more for parts if a manufacturer warranty claim is involved; longer than that, follow up in writing on the same email chain and ask for a status update with a date.
Sources
- U.S. Department of Energy, Energy Saver — Energy Performance Ratings for Windows, Doors, and Skylights. NFRC U-factor, SHGC, VT, optional Air Leakage and Condensation Resistance; air leakage ratings assume proper installation. Accessed October 28, 2026.
- ENERGY STAR — Residential Windows, Doors and Skylights Key Product Criteria. Version 7.0 effective October 23, 2023; air leakage ≤0.3 cfm/ft² alongside climate-zone U-factor and SHGC criteria. Accessed October 28, 2026.
- U.S. Department of Energy, Energy Saver — Tips for Sealing Air Leaks. Incense-stick depressurization test for detecting air leaks around windows and doors; caulk and weatherstrip windows that leak air. Accessed October 28, 2026.
- U.S. Department of Energy, Energy Saver — Caulking. Caulk is used for stationary components (frame, trim); weatherstripping is used for moving components (operable sashes). Accessed October 28, 2026.
- ASTM International — ASTM E2112-23, Standard Practice for Installation of Exterior Windows, Doors and Skylights. Installation standard practice; the manufacturer’s installation instructions prevail where they conflict with the standard. Accessed October 28, 2026.
This page uses plain text and tables instead of product photos because it is not about one product. We do not reproduce manufacturer images without written permission.